I'm having a faux cupcake sale...but just in a day!
All single faux cupcakes on my Etsy shop will be sold for only $6.95 each. And all set of 3's will be $18.95 per set.
The sale will be on OCT. 28, 2008, and will start at 3:00pm (GMT+08:00) and ends on OCT. 29 at 3:00pm (GMT+08:00).
And what's the occasion you ask?...it's my 30th birthday! :)
So save the date!...and I'll see you all on my Etsy shop!!!
Sunday, October 26, 2008
Saturday, October 11, 2008
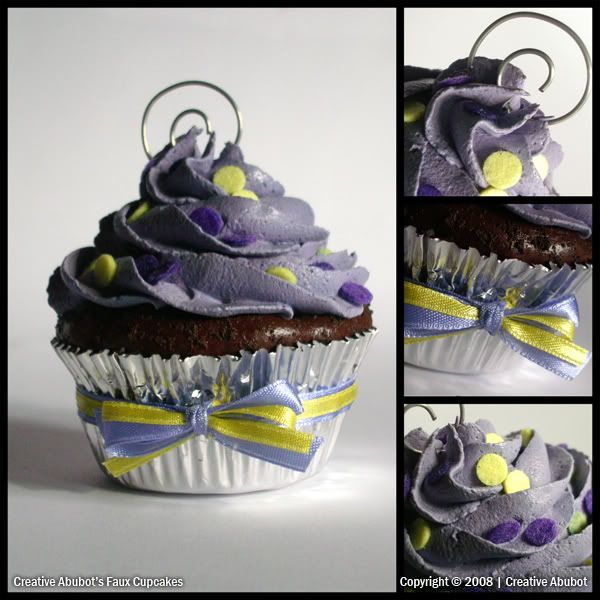
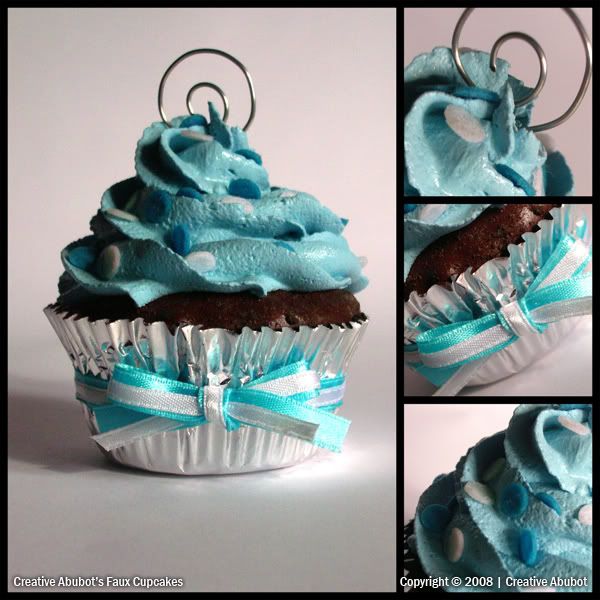
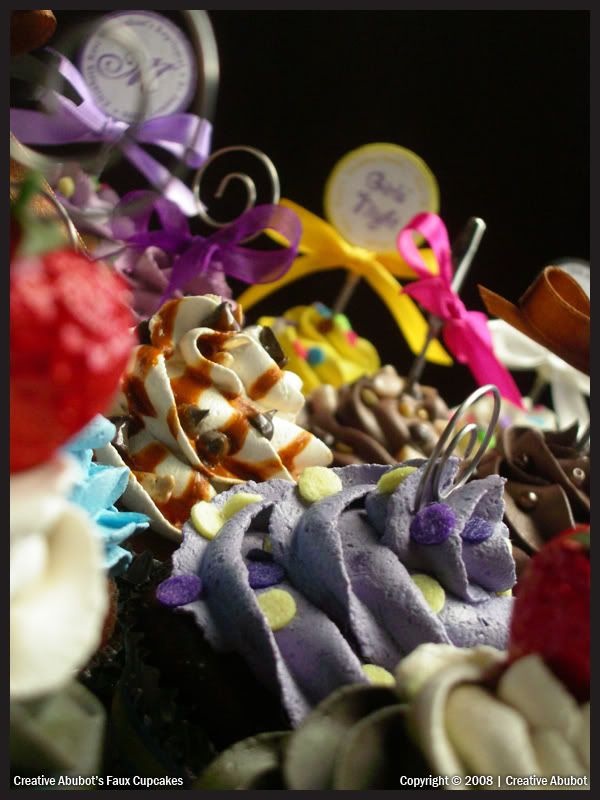
New Faux Cupcakes Now Available on my Etsy Shop
Okay, I know I promised a lot of you that I'll be posting my faux cupcakes on Etsy by mid-September. I'm very sorry to disappoint you all. I just got this new freelance job which requires me to work for long hours...which means lesser time on crafting.
Anyways, the long wait is over! I just finished posting some new faux cupcakes. Although I only made a few pieces of each design.
Please visit my shop at www.creativeabubot.etsy.com ... and I hope that you'll find something you'll like!
Anyways, the long wait is over! I just finished posting some new faux cupcakes. Although I only made a few pieces of each design.
Please visit my shop at www.creativeabubot.etsy.com ... and I hope that you'll find something you'll like!
Monday, September 1, 2008
Simple Cupcake Pedestal Tutorial

I made these simple but elegant cupcake pedestals this weekend. I made it to display my faux cupcakes...but of course you can use it for REAL cupcakes, too!
Materials:
- plastic coasters - make sure they're thick and sturdy as these will be the base of your pedestal/s.
- plastic saucers - make sure the size will fit a standard 3oz cupcake
- Wilton 5" Grecian Pillars
- clear epoxy adhesives (or you may also use a glue gun)
- old newspapers
- piece of old cloth or rug
- quick drying spray paint (white)
- gauze/face mask (for protection while spray painting)
- pencil

Instructions:
--------------------------------------------------------------------------------------------------------
Step 01 - Make sure that the coasters, saucers and pillars are free from dirt and oil. Clean them by wiping with a piece of cloth or rug.

--------------------------------------------------------------------------------------------------------
Step 02 - Find a well ventilated place to do your spray painting. Line the floor with old newspapers. Place the plastic coasters and saucers on the newspaper, line them together with spaces apart. Don't forget to wear your mask!!! Now spray paint the top part first (according to paint instructions). Once the paint is dried, spray paint the bottom part. You may coat them a few times to cover them fully in white....that's if your coasters and saucers are of colors other than white.

--------------------------------------------------------------------------------------------------------
Step 03 - Once the paint has dried, you may attach the pillars. Position a pillar at the center of a coaster. You may mark this lightly with a pencil.

--------------------------------------------------------------------------------------------------------
Step 04 - Mix the clear epoxy adhesive according to packaging instructions...skip this step if you'll be using a glue gun (hot glue).
--------------------------------------------------------------------------------------------------------
Step 05 - Apply epoxy at the bottom of the pillars...or hot glue if you're using a glue gun.

--------------------------------------------------------------------------------------------------------
Step 06 - Press the pillar firmly on your marked coaster.

--------------------------------------------------------------------------------------------------------
Step 07 - Place the pillar upside down at the bottom of the saucer. Center it and mark it again with a pencil.

--------------------------------------------------------------------------------------------------------
Step 08 - Apply epoxy or hot glue at the top of the pillar.

--------------------------------------------------------------------------------------------------------
Step 09 - Press the pillar firmly down the marked bottom of the saucer.

--------------------------------------------------------------------------------------------------------
Step 10 - Do steps 03-09 on the rest of the coasters, saucers and pillars. When you're done at this stage, you can already use them, but....

--------------------------------------------------------------------------------------------------------
Step 11 - ...you may want spray paint them one last time. And don't forget to wear your mask!!!
 --------------------------------------------------------------------------------------------------------
 Voila! Whether for fake cupcakes or real cupcakes, these pedestals are perfect to display them!

You may also experiment on different spray paint colors...I tried chrome with this one!


Hot glue some huge and gorgeous artificial flowers at base of the pedestals and they make wonderful and elegant centerpieces!!!


Well, that's it for now...I hope you enjoyed my tutorial! :)
P.S. Those faux cupcakes are coming soon on my Etsy shop! ;)
Thursday, July 3, 2008
My Faux Cupcakes on a Canadian Photographer's Blog!!!

I was...or rather my faux cupcakes, were featured on a Canadian photographer's blog.
Eternal Reflections Photography specializes in wedding photography. They take really beautiful wedding pictures.
Radelle, the owner of the photography studio, found my Elegant Faux Cupcakes while browsing Etsy. She said on her message to me via Etsy's convo, that she fell in love with my Elegant Faux Cupcakes and that she featured them on their blog.
A lot of brides-to-be visit their blog for ideas, and featuring my faux cupcakes will help give my handcrafted items some exposure. I hope this will give me the break that I needed (...and actually make a sale!...Crossing my fingers).
If you live in Canada and in need of a great wedding photographer contact Radelle of Eternal Reflections Photography!
If you need a unique and elegant wedding favor.....contact...ehem!....me!...at creativeabubot@gmail.com!
Wednesday, July 2, 2008
Finally........
.....I can now load Etsy on my PC. Yeeepeee!
I used to load it on a proxy server, but flash don't run with it though. But I thought that's ok than no Etsy at all. But now I don't load it on a proxy server, I can now load Etsy normally on my browser. My brother fixed my connection. I think it has something to do with our router.
See ya on Etsy!!!!
Tuesday, July 1, 2008
I wanted to list my faux cupcakes...and I couldn't load Etsy!!! Arrrrgggg!!!!!
I've already finished taking pictures of my handcrafted faux cupcakes. I'm ready to list them on Etsy. Etsy is a great site for people who wants to sell their craft products. However, for some unknown reasons, I suddenly couldn't load Etsy.com both in Firefox and Explorer. I thought that it could be a firewall thing, and that it's blocking Etsy. But even though I turned off my firewall I still can't seem to load that web site. I searched the internet for what could possibly be the culprit. I found out that there are people who are experiencing the same problem...and not just on Etsy, but also on some other secure sites. Some says it might be viruses like Malware that's preventing me to open the site. I did ran a scan to check my computer for viruses and potential attacks, and it's clean. So to be sure, I even reformatted my computer! But the problem persists. Some says it has to do with random DNS ....which I have no idea about!!! For three days I longed to see Etsy. And it's killing me. I ended up listing my products on other sites like DaWanda and SilkFair (which is not a bad idea!....and DaWanda is a great site for crafters, too!).
And now is my day 4 without Etsy, and no reply from my ISP!
Last night, out of my frustration, I went out to surf the net in a cafe! So there, I get to list my stuff on Etsy. Yeeeey!!!!
I just hope my ISP would call me anytime soon and help me fix the problem. :p
And now is my day 4 without Etsy, and no reply from my ISP!
Last night, out of my frustration, I went out to surf the net in a cafe! So there, I get to list my stuff on Etsy. Yeeeey!!!!
I just hope my ISP would call me anytime soon and help me fix the problem. :p
Thursday, June 26, 2008
My Faux Cupcake Story
These past months, I've gone gaga over cupcakes. I've spent countless of hours surfing the net for recipes and tricks on baking that perfect cup. I've cried over my over baked cupcakes, and over my frostings that have gone bad. It's been quite a while since I started my quest on making my perfect cupcakes. And now, my cupcakes, though not perfect (yet), are "o.k."...and my son loves it. But due to the non-stop increasing prices of almost everything...including gas (and LPG which I use on my oven)... I have taken my cupcake baking addiction to a halt.
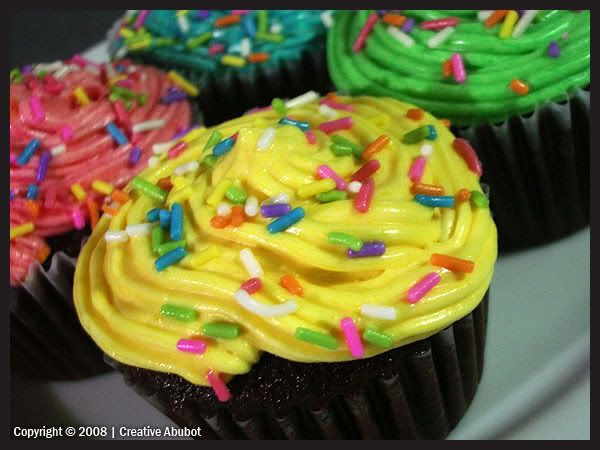 ^One of the first batches of cupcakes that I have made.
^One of the first batches of cupcakes that I have made.I've since then diverted my attention to faux cupcakes instead, after stumbling upon few websites which create such fake treats. They looked so yummy for something that you cannot ever eat... and such an eye candy, too! And since I'm a crafty person myself, I wanted to get my hands busy creating some of those fakies. I think it's a great project idea to make and give out as gifts to family and friends. And as a single mom trying to make ends meet, I thought I could sell these (...if I even succeeded in making one), and create extra income. But how do you make one?
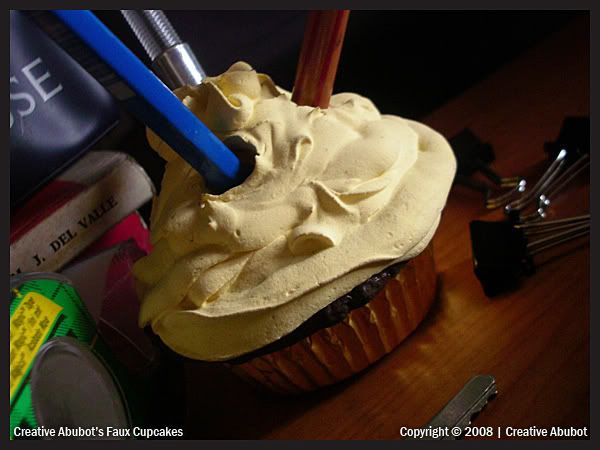
I have searched all over the internet for instructions and tips. I only found a few suggestions like to use "this" and "that" materials. What the heck? I might as well give it a try! So, I rushed to and rummaged my dad's garage for some left-over materials that I could use. I was really excited to create my first faux cupcake. Alas, I ended up with a very heavy, uninviting, sad looking cupcake. It's so heavy that I don't think it would be a great idea to even sell it. And darn, the fake frosting ran down like a mud slide after piping and cracked after drying.
I still have it, my first awful faux cupcake. I poked it with pens while still drying (...out of sheer frustration!) Now, it's sitting on my desk, posing as a pen holder.... an ugly one, that is! Yeah, I know, it's not just a fake cupcake...it's also a fake pen holder! LOL!


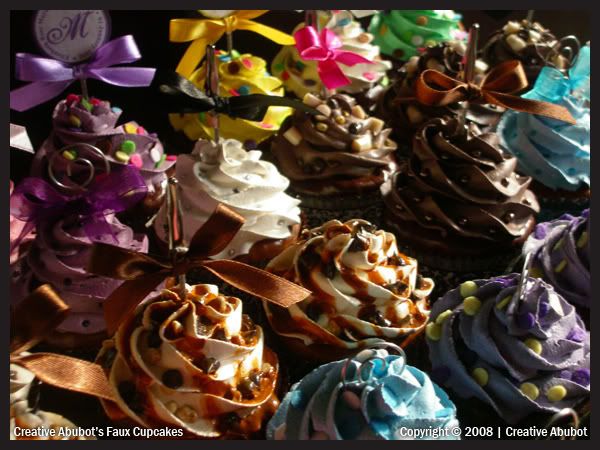
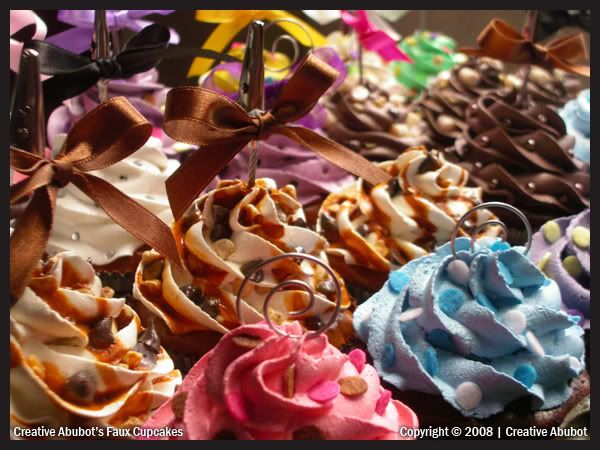
After my first attempt on making a faux cupcake, I still tried... and tried... and tried!. But to no avail, I still ended with same sad looking cup. I never thought that it would be this hard to create one that looks like the real thing. I couldn't sleep for weeks, trying to figure out how to do this. And the hardware store has been my favorite hangout after work. I would stand in the aisles and stare at different products. Would this one work? Or maybe that one? After trying out a handful of different products and materials, I have finally came up with my own formula (... and it's still a secret! Sorry!) My first faux cupcakes with this formula is way, way, way much better looking than my sad cupcake pen holder. And it's a lot lighter, too! Each faux cupcake is approximately 43 grams to 45 grams, while my sad looking faux cupcake weighs 135 grams (or even more!). And yes, they now look yummy! ...and no longer are they pen holders, they're now photo holders! Haha!
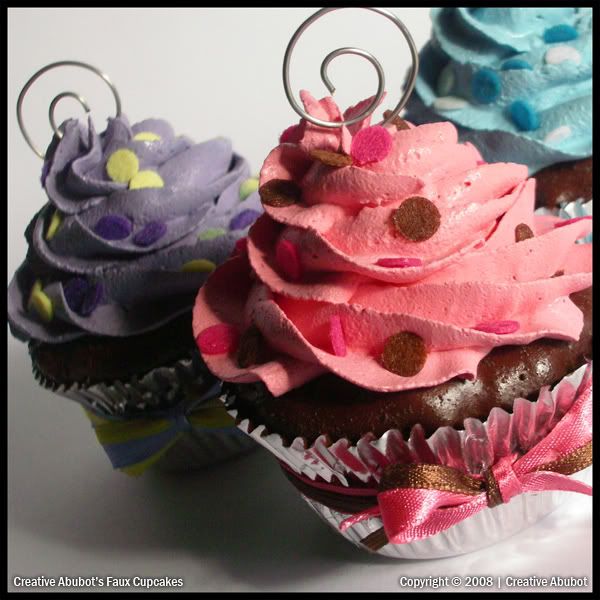
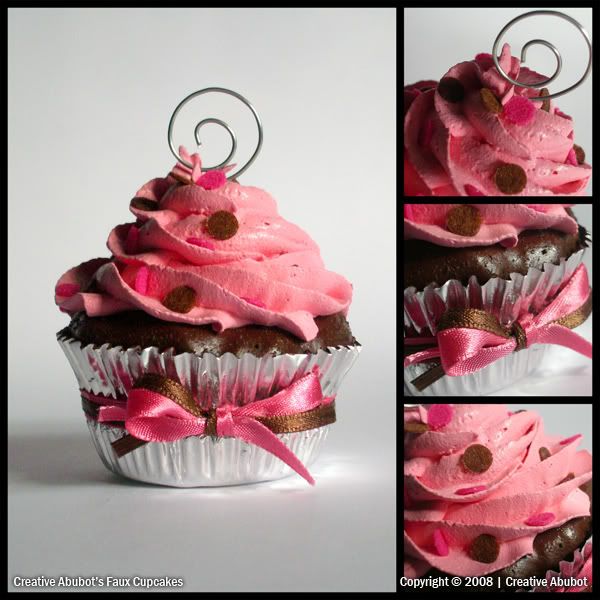
I have kept on polishing and perfecting my faux cupcake formula. I want my faux cupcakes to look as real as possible. I don't want my fake frosting to look dry, like those cake displays on cheap bakeries. I'm still experimenting on different materials. But for now, I'm very happy with my secret formula and I really enjoyed creating these fake sweet treats. I have already created different designs (or flavors...uh...whatever you call it!) of faux cupcakes. I remembered back in college, I have a package design class ....and I enjoyed creating the mockup or fake foods more than the packaging design itself!
 Maybe for now, I'll be selling faux cupcakes on a "made-to-order" basis only. I'll take more pictures of the rest of my faux cupcakes and post it here next time.
But if you are interested in my faux treats, please email me at creativeabubot@gmail.com.
And for my next assignment... create a listing on ETSY ... and also, pimp my sad cupcake pen holder! :)
I have searched all over the internet for instructions and tips. I only found a few suggestions like to use "this" and "that" materials. What the heck? I might as well give it a try! So, I rushed to and rummaged my dad's garage for some left-over materials that I could use. I was really excited to create my first faux cupcake. Alas, I ended up with a very heavy, uninviting, sad looking cupcake. It's so heavy that I don't think it would be a great idea to even sell it. And darn, the fake frosting ran down like a mud slide after piping and cracked after drying.
I still have it, my first awful faux cupcake. I poked it with pens while still drying (...out of sheer frustration!) Now, it's sitting on my desk, posing as a pen holder.... an ugly one, that is! Yeah, I know, it's not just a fake cupcake...it's also a fake pen holder! LOL!
After my first attempt on making a faux cupcake, I still tried... and tried... and tried!. But to no avail, I still ended with same sad looking cup. I never thought that it would be this hard to create one that looks like the real thing. I couldn't sleep for weeks, trying to figure out how to do this. And the hardware store has been my favorite hangout after work. I would stand in the aisles and stare at different products. Would this one work? Or maybe that one? After trying out a handful of different products and materials, I have finally came up with my own formula (... and it's still a secret! Sorry!) My first faux cupcakes with this formula is way, way, way much better looking than my sad cupcake pen holder. And it's a lot lighter, too! Each faux cupcake is approximately 43 grams to 45 grams, while my sad looking faux cupcake weighs 135 grams (or even more!). And yes, they now look yummy! ...and no longer are they pen holders, they're now photo holders! Haha!
I have kept on polishing and perfecting my faux cupcake formula. I want my faux cupcakes to look as real as possible. I don't want my fake frosting to look dry, like those cake displays on cheap bakeries. I'm still experimenting on different materials. But for now, I'm very happy with my secret formula and I really enjoyed creating these fake sweet treats. I have already created different designs (or flavors...uh...whatever you call it!) of faux cupcakes. I remembered back in college, I have a package design class ....and I enjoyed creating the mockup or fake foods more than the packaging design itself!
Maybe for now, I'll be selling faux cupcakes on a "made-to-order" basis only. I'll take more pictures of the rest of my faux cupcakes and post it here next time. But if you are interested in my faux treats, please email me at creativeabubot@gmail.com.
And for my next assignment... create a listing on ETSY ... and also, pimp my sad cupcake pen holder! :)
Subscribe to:
Posts (Atom)


